Showing posts with label Recipes. Show all posts

Monday, January 21, 2013

Frog Eggs {Chi Seeds}

Chia seeds are pretty popular in drinks in India. I always avoided them because I'd think of them as frog or fish eggs growing up. I imagine the texture to be slimy and thick as it goes down my throat. Eek! I don't even know how they taste. A few people I am subscribed to on YouTube have recently begun drinking chia drinks. I googled chia seeds a few minutes ago to find out that these are the same "fish eggs" my mom has been trying to get us to drink for years.


The photo on the left are the dry seeds. On the right is what they become after soaking in water. They seem to grow or develop a gelatinous membrane around them.


I think it's funny when healthy things become "trendy" when in many cultures, people have been doing the same things for centuries. Although I haven't taken advantage of chia seeds in the past, I did some research and don't mind giving it a try. However, I won't be running out to whole foods to buy the expensive drinks or seeds. They can be easily found at your local Indian/Pakistani store for cheaper.  The Mamma Chia drinks on the left are pretty popular, I guess. Because that's what first came up when I googles "chia seeds". They're pretty pricey per bottle, too.


My mom has been trying to get us to try them for more than two decades. Now that I see people on YouTube getting into it, so will I. Lame, right? I can see my mom rolling her eyes already haha. I'm not one to jump on the bandwagon, but I only became interested after finding out that this is what I've seen growing up. And I didn't realize it had so many health benefits. So I will give it a shot. :)

I'm going to list some health benefits of Chia seeds I found on a website. Click here to read the details.

  1. Lose weight without starving
  2. Balance blood sugar levels
  3. Prevent diverticulosis/diverticulitis, especially in the elderly
  4. great source of Omega-3
  5. great source of anti-oxidants
  6. use as substitutes on baking and cooking
  7. control food cravings
And HERE are other ways to incorporate Chia seeds into your life. You can even use it as an egg substitute for baking! Apparently this works like Tofu - it's pretty tasteless and takes on the flavor and even enhances the flavor of whatever you put it in. 

Now, I'm not sure when or how I'll be using Chia seeds. But I thought it was interesting that things my Indian Culture has been using for centuries is only now becoming a trend. Same as Turmeric and other Indian spices and foods. 

If any of you have tried Chia Seeds, leave a comment below and let me know how you like it. Maybe that'll get some courage in me to try it. :)

Monday, January 7, 2013

Banana Bread

You will hate me because this is going to make you gain unnecessary weight and make you unhealthy, but happy. So maybe you won't hate me. I do not have a photo, because I forgot to take one and a few hours later, there wasn't much to take a picture of. It is that good. My mom gave me this recipe, I'm not sure where she got it from, but she's been making it since I was little. And she gets an A+ every time.

I have to hide my fresh Bananas in a brown bag in the pantry for about a week. Less, if I find some browning one's at the grocery store. Otherwise they finish before they can properly ripen for this bread. You want it to get to the point where the peel is mostly brown/black. but not too bad that it's ready to throw out. I'm not sure if that's safe, but definitely not appetizing. I wait until it's black on the outside, and the bananas still hold their shape but are soft. You don't want pretty, yellow bananas. As they ripen, they become sweeter and more delicious.

Banana Bread

Ingredients:
2-3 ripe bananas, sliced
2 cups of all purpose flour
2 cups of brown sugar
2 eggs
1 cup olive oil, you can probably use any vegetable oil
1 tsp vanilla
1/2 tsp salt
1 tsp baking powder
1 tsp baking soda
1 cup of chopped walnuts

Directions:
1. preheat oven to 375 F
2. grease a loaf pan
3. Mix together dry ingredients, except walnuts
4. in another bowl mix together wet ingredients, inclusing bananas. You can mix this until the bananas get mashed, with chunks in it. But don't go as far as to make a puree.
5. mix the wet and dry ingredients. Mix until it is JUST mixed. Do not over mix.
6. fold in walnuts.
7. Pour batter in loaf pan. if you aren't going to sit around and lick the bowl, scrape of every bit. I hate how they leave so much mix in the bowl on cooking shows.
8. Bake for 45-50 minutes, or when toothpick comes out clean.

note: my oven cooked the top quickly but the inside was still mush. What I did was cover the bread in foil at this point, to prevent further browning and  possible burning. I lowered the temperature to 350 F and checked it every 10 minutes until the toothpick came out clean. If you like the center to be super soft, then you can take it out a little earlier. Next time I am going to try baking it at 350 F, since my oven seems to cook things in half the time, not allowing the inside to cook much.

Tuesday, December 4, 2012

Easy Italian Chicken with Greek Garbanzo Bean Salad


You cannot fail with this recipe. Cannot. Cannot. Even if you wanted to.

My husband wanted to start eating baked or grilled chicken for lunch, rather than eating something fried, oily and unhealthy from the cafeteria at his workplace. So I needed something with a lot of flavor,  that wasn't fattening and easy to eat. Something healthy and filling.

I found this Italian chicken recipe and it was like child's play. And delicious, too! I cooked it the night before and stuck it in a storage container in the fridge along with the marinade I cooked it in, so it could absorb more moisture while it sat in the fridge overnight. The result? Very juicy chicken, despite baking for an hour in the oven. I also spooned the marinade over the chicken halfway through baking time.

But a chicken breast was not enough. Instead of adding pasta or turning it into a sandwich I paired this with this Greek Garbanzo Bean Salad. I messed with the measurements a little but it turned out great. And since the flavors were similar, I sliced up the chicken and stuck all of it in one box.

If you decide to make this, enjoy!

ps - I apologize for the quality of the photos, I took them with my phone.

Thursday, October 13, 2011

Peach Cobbler

This peach cobbler is super easy to make. I've made it twice with great reviews. I wish I could make it over and over until peaches go out of season! I don't believe in using frozen berries for anything other than smoothies and cold things. Eat it warm with vanilla ice cream. It's delicious and you'll love it. :)


My photo isn't that great, but I made two batches last time since we had a lot of people over. Photo credit, my SIL with her cell phone. 


Here's the link and the recipe is below. 


Ingredients

  • 4 cups peeled, sliced peaches
  • 2 cups sugar, divided
  • 1/2 cup water
  • 8 tablespoons butter
  • 1 1/2 cups self-rising flour
  • 1 1/2 cups milk
  • Ground cinnamon, optional

Directions

Preheat oven to 350 degrees F.
Combine the peaches, 1 cup sugar, and water in a saucepan and mix well. Bring to a boil and simmer for 10 minutes. Remove from the heat.
Put the butter in a 3-quart baking dish and place in oven to melt.
Mix remaining 1 cup sugar, flour, and milk slowly to prevent clumping. Pour mixture over melted butter. Do not stir. Spoon fruit on top, gently pouring in syrup. Sprinkle top with ground cinnamon, if using. Batter will rise to top during baking. Bake for 30 to 45 minutes.
To serve, scoop onto a plate and serve with your choice of whipped cream or vanilla ice cream


The only "downside" to this is that it requires self-rising flour. I did not have self-rising flour but followed a recipe to make some. I didn't see myself using the flour often enough to go buy a bag. But it turned out great either way. I am lazy so next time I think I'll just buy some self-rising flour. 

Wednesday, August 17, 2011

Banana & blueberry nutella crepes

Crepes! I love them sweet & I love them savory. I love them in the morning and I love them in the evening.


Pardon the photos, I didn't think I'd be blogging about this. And pardon the lack of presentation, as I knew my baby sister wouldn't care about how it looks & I was too busy dying starving fasting to make it look pretty. As long as it has nutella on and in it, she's good to go.

I thought these would be difficult because they're so thin. But after one or two I got the hang of it. I made these a few days ago for my little sister for breakfast. And then again for when we broke our fast.

I love all recipes. I get most of my stuff from there. Here is the basic recipe I used this time. I've tried it with vanilla and nutmeg as well, but went plain this time. For the filling I used nutella, bananas and blueberries. The top of the crepe is sprinkled with sifted powdered sugar.


Ingredients

  • 2 eggs
  • 1 cup milk
  • 2/3 cup all-purpose flour
  • 1 pinch salt
  • 1 1/2 teaspoons vegetable oil

Directions

  1. In a blender combine eggs, milk, flour, salt and oil. Process until smooth. Cover and refrigerate 1 hour.
  2. Heat a skillet over medium-high heat and brush with oil. Pour 1/4 cup of crepe batter into pan, tilting to completely coat the surface of the pan. Cook 2 to 5 minutes, turning once, until golden. Repeat with remaining batter.

ps - I used butter, not oil to cook them. Butter makes everything better. 

Monday, August 8, 2011

Easy Stuffed Mushrooms

I made these recently for a party and I got a few requests to make them again as well as requests for the recipe, so I thought it blog worthy and have decided to share the recipe with you today.

When I think of stuffed anything I think a lot of work. I don't know why. I've made polenta stuffed peppers before and spinach and mushroom stuffed chicken, both which have turned out DELICIOUS. But I tend to shy away for recipes with the word "stuffed" it its title. I'm glad I made these. Make these and you will, too. :)

I really shouldn't blog about food while I'm fasting but I thought I'd post this before I forgot. And I haven't posted in months so it's about time.

These are quick and simple. Recipe at the bottom.


1. Clean the mushrooms with a damp paper towel or cloth. Remove stems. I prefer you NOT throw them away and there are recipes that reuse the stems but this one doesn't/ Make a fritatta or omlette or quiche with the stems.

2. We will be grilling the mushrooms and they can get very dry if you do, so take a brush an coat each mushroom with olive oil or if you need to make a million like I did, put the mushrooms in a plastic bag and throw in oil. Toss it aside and make sure they all get coated with oil. They'll look dry, but they soak up a LOT of the oil. A light coat is enough.

3. Mix equal amounts of cream cheese and parmesan cheese. For about 80 mushrooms I used 3 cups of each. Flavored cream cheese is better. I used fresh chives. Add salt, pepper and garlic/garlic powder to taste.

4. Spoon the mixture into the mushrooms. Just enough to fill them is fine. If it looks like it's too little, don't worry. The mushrooms will shrink on the grill. I sprinkled the tops of my mushrooms with breadcrumbs and red pepper powder, to give it a little kick.

5. Heat a grill. You can use a stove-top one. If you don't have a grill just use a regular pan. It should be ok.  DO NOT bake these. See how some of them are burned in the pic? Those ones went in the oven and the tops burned. I was in a hurry and we were trying to expedite the last batch, since my grill was tiny.

6. Grill them, covered, until they are not firm anymore. But don't wait too long or else they'll become mushy. 5-10 minutes? And these are best served hot off the grill. Enjoy!!

7. Ps - I preferred the brown baby bellas over the big white button mushrooms in terms of aesthetics. I have no idea how the white ones tasted. But since the white ones are bigger I'd probably have used rice or spinach in the stuffing. The smaller ones become even smaller after cooking so filling them with nothing but cheese isn't as bad. :)

Thursday, January 13, 2011

Cumin Grilled Chicken

Okay so now that I've been cooking about twice a week, its important that I find fun and interesting recipes or else the Hubster and I will get really bored of our food... 


So I found this excellent recipe on www.foodnetwork.com of Cumin Grilled Chicken Breasts. I did my own twist by lightly frying/sauteing it instead of grilling (I don't have a grill...) and by adding some lemon. 


Ingredients

  • 4 skinless boneless chicken breast halves pounded to 1/2-inch thickness (Mine were really thick so I just sliced them in half)
  • 2 teaspoons olive oil
  • 1 teaspoon ground cumin (I put a bit more b/c I really love cumin =D )
  • 1/2 teaspoon salt
  • 1/4 teaspoon pepper

Directions

Heat a few tbsp of oil in a large frypan on medium-high heat. Rub chicken breasts with olive oil. Mix cumin, salt and pepper and rub spice mixture evenly onto chicken breasts. Cook chicken in frypan until it is cooked through, about 4-5 minutes per side. Remove from heat, let rest for 5 minutes. 

I added some squeezes of lemon on top before serving and it was purely delectable. We ate it with homemade fried cajun rice. The recipe for that is pretty simple. Boil 2-3 cups of water. In a wok heat some oil and saute a half chopped onion and some mixed vegetables until cooked (a few minutes). Add some salt, cajun seasoning (tons of it) and half a tsp of paprika. Put on medium and mix in the boiled rice. Mix around, add some more cajun and salt to taste and you're all set to go :)  

Tuesday, June 15, 2010

Chicken Parmesan


I really like cooking. It's fun. And delicious. :) I got this recipe off a Cooking Light magazine back in the day. I can't remember exact measurements, but this recipe allows for variation. I don't know if this even the right recipe. BUT I've been making it this way since I lost the recipe and it's pretty darn good. It's simple, too. I like cooking based off estimation rather than exact measurements. I like tasting and adding or fixing as I go alone.

Ingredients
  1. Pasta. Any type. Spaghetti is good here. I think that's Penne in the picture?
  2. 2 Chicken breast halves
  3. Seasoned bread crumbs
  4. Parmesan cheese
  5. Flour
  6. An egg white or two
  7. Some sort of sauce. Spaghetti or marinara, etc. Preferably tomato based.
Steps:
  1. Boil the pasta as per cooking directions on the box.
  2. Pound the chicken breast a little bit, especially if it's really fat. Once we got a really thick one. Ugh. So I had to slice it in half to make it thinner. Anyways pound away. Make sure you cover the chicken in plastic. I don't like raw chicken directly touching stuff.
  3. Put the flour on a plate. Estimate how much you'll need to cover however many breasts you're using.
  4. Put the egg whites on another plate.
  5. Put the bread crumb and Parmesan crumbs on a third plate. I don't know how much of each I use. But I found that grated Parmesan works much better than shredded. More bread crumbs than Parmesan? Maybe 2 parts bread crumbs to one part Parmesan.
  6. Dip the chicken in flour and cover completely. Then in the egg whites. And then the bread crumbs. Make sure you get it covered all over. You can even repeat this step if you wish.
  7. Fry it. Shallow fry. I use very, very little oil and it still tastes good. Cook all of the chicken.
  8. Now it's time to assemble. Put the pasta in a serving dish. Put however much sauce you want on top. A lot is good. Then top with chicken breasts. You can put the breast on there as is or you can slice it and arrange it on the pasta. Put more sauce on top. Top with cheese. Parmesan or mix it with mozzarella like how I did in the picture. Whatever floats your boat.
  9. Broil it until the cheese is melted, bubbly and brown if you wish.
  10. Enjoy. :)

Friday, May 28, 2010

I like fish.

I've been on a fish kick lately. White fish. I'm not a fan of Salmon or those other meaty fish, except Tuna. But then again that was canned. I've never tried a Tuna steak or anything. This one in the photo below is called Swai. 

It's becoming popular because it's super cheap? We got ten filets for ten dollars at our local grocery store. And each filet is pretty big and is only 170 calories. I tried looking up recipes for this particular fish but I couldn't find any specific ones. It doesn't need much to give it flavor, though. My mom cooked this by sprinkling salt, pepper and parsley on the fish and then fried it in a tiny amount of butter. Yum.

Oh and I also recently started mixing my salads up with fruit: Strawberries, apples, pears, dried cranberries. Anything goes, really. It's a nice upgrade from my standard garden salad; especially because I don't use dressing. Try it??

Monday, February 15, 2010

Macarona Bechamel

I love to cook. Seriously. Today I'm cooking an Egyptian dish... Macarona Bechamel. It's reaaallyy good! My teacher in Egypt taught me how to make it.


Here's my recipe of it..
  1. Boil 2 bags of Penne pasta and set aside
  2. Chop 2 onions and fry in pot
  3. Add 1 lb ground beef to the onions and keep stirring until cooked
  4. Add a bit salt, pepper, 2 tsp cumin, and a bit of garlic to the beef
  5. Boil milk in another pot with salt, pepper, and cumin for 15-20 minute
  6. In a different pot heat 1 cup fat (butter, margarine, ghee ... I like pure butter/oil ghee)
  7. Add the same amount (or a little more) of flour to the mixture
  8. Slowly add milk to the mixture until it becomes a creamy thick béchamel sauce (this takes a lot of mixing and arm muscles! The mixture will be thick so keep adding more milk until it becomes a thick saucy consistency)
  9. Mix half of the béchamel sauce with the pasta in a large foil tray or casserole dish
  10. Put half pasta on the bottom of a large pan then add all the beef then add the rest of pasta above beef.
  11. Add the rest of the béchamel on the top of the pasta
  12. Crack and egg and mix it in a separate bowl. Spread it on top of the pasta Put in oven for 30 minutes until golden brown at the top
  13. Dig in and Enjoy! If you make it, let us know how it turned out!

Thursday, November 19, 2009

quicky

Wassssup party people???! I had the randomest urge to share that. OK soooo my birthday's next week..yaaay. I already feel 20 so i'm not expecting a huge shift or an epiphany *shrug*. Something I AM excited about though, is this recipe I found buried in my phone that I had made a year ago on my brother's birthday. Think coconuts and limes mmmm, my too favoritest flavors ..together! lime coconut cupcakes, a tingly, tangy, sensation! I must share!


4 oz butter
4 oz sugar
2 eggs
2 oz coconut
3 limes zested and juiced
6 oz flour
1t baking powder

**warning** this does have a very lime-y flavor so if your not a big fan of limes you can mix in 1 1/2 limes and a quarter cup of water :)
on with the recipe! it's really quite simple:

Preheat oven to 350f, whisk butter and sugar until creamy. Add eggs and whisk. Mix in coconut, lime zest/juice. Fold in flour and baking powder, spoon into cupcake pan. Bake 15-20 min.
Easy peasy lemon squeezey!

Sunday, July 26, 2009

THIS IS WHY YOU'RE FAT

HI, PEOPLE.

I CAN'T STOP EATING OR TYPING IN CAPS. EVERYTHING IS DELICIOUS IN THE WORLD OF FALLING UP.

THIS IS MY NEW FAVORITE WEBSITE. I WISH I COULD EAT ALL OF IT. JUST REPLACE THE PIG WITH OTHER MEAT. MEOW.

http://thisiswhyyourefat.com/

Sunday, July 5, 2009

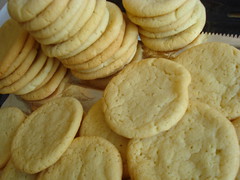
Sugar Cookies!!

Controlled Chaos came over one day that I made sugar cookies. She ate about ten of them. So I made her a stack before I left Michigan.

Yes, a stack. I don't know why it didn't occur to me to give it to her in a glad box or something. But I stacked about 20 sugar cookies and rolled them up in foil. They fit better in my purse that way. haha.

Anyways, I don't love these but she does. My whole family loves them. Maybe I don't love them because I made them? No need to alter the recipe. They're great the way they are. Sometimes I roll them out and use cookie cutters, but to be honest with you, the thicker they are the better. So drop cookies are just fine.

Click here for the recipe. Enjoy!!

Saturday, June 20, 2009

Carrot Cake

I love carrot cake. I found a really good recipe. If you like texture then this is perfect. I got the recipe from Food Network. The batter was kind of liquidy and I was scared it wouldn't bake properly but it did beautifully. And you could see the shreds of carrots in there which i like because it makes it seem fresher. :) I didn't have all spice so I just doubled the amount of cinnamon and it still tasted really great. Click here for the recipe.


The above is my cake. It's two layers but doesn't look like it in the picture because I didn't put enough icing in the middle. So make sure you're generous with that. The next day I removed the top layer and threw in a lot of icing. haha. It was messy but looked better. And if I had waited a bit to ice the cake the presentation would be better but the family rushed me so they could eat it. Enjoy. :)

Thursday, May 14, 2009

Breakfast: Basic Popovers


So I was talking to MarjnHomer online about food and mentioned popovers. I found a great recipe and thought I'd share. This is for you, MarjnHomer. :)

I've made them before but they never were too great. Yesterday I tried this recipe from food network and they came out great {see pic above}. This is a basic recipe that can be eaten with jam, marmlade, butter, etc. But there are flavored ones. Jsut search the site.

Ingredients
1 tablespoon unsalted butter, melted and cooled, plus 1 teaspoon room temperature for pan
4 3/4 ounces all-purpose flour, approximately 1 cup
1 1/2 teaspoons kosher salt
2 large eggs, room temperature
1 cup whole milk, room temperature

Directions
1. Preheat oven to 400 degrees F.
2. Grease a 6-cup popover pan with the 1 teaspoon of butter.
3. Place all of the ingredients into a food processor or blender and process for 30 seconds. Divide the batter evenly between the cups of the popover pan, each should be about 1/3 to 1/2 full. 4. Bake on the middle rack of the oven for 40 minutes. Remove the popovers to a cooling rack and pierce each in the top with a knife to allow steam to escape. Serve warm.

My suggestions:
* Make sure you follow the directions perfectly. Make sure everything that needs to be at room temperature, is.
* You can use cupcake tins instead of muffin tins.
* Grease the tins REALLY well and maybe even flour it or else it'll stick and be really hard to take out. Your popovers will then become popunders by the time you manage to pull them out.
* If the popovers are sticking, don't do anything until they cool completely. Or else they'll be impossible to take out and the shape won't be retained. Cut around it with a knife and gently pull them out. If they're completely cool the shape will stay. They are NOT attractive at all if they sink.

Friday, April 3, 2009

Fooooooooood

I never thought I would be able to identify with a twelve year old boy who just found internet porn. But I have. And it is no less shameless.
www.tastespotting.com is my version of porn. Filled to the brim with delicious dishes enticing me to to click on their succulent pictures, I dream about baking/frying/stirring these bad boys till the sun comes up! Hello, my name is Snake Charmer, and I am a food whore. I love to cook- I love everything that has anything to DO with cooking! I went to Macy's the other day to sniff some cologne with a friend, and found my way to the third floor- kitchen appliances. I stood there salivating at the site of the KitchenAid Artisan Stainless Steel 5Qt Stand Mixer... i'm getting goosebumps just thinking about it. God I love preparing my kitchen for the concoction of food!- scrubbing down the counter, setting up bowls and mixing spoons. I heart sifting and whisking and- and melting! Wow. I want to bake something right now. But instead, I think i'll share a few recipes that I am going to attempt- most likely tommorow.

For the main course I think i'll go with the Asparagus Lemon Pasta, because I love the light combination of lemon and parsley on pasta. The ingredients call for:
2 pounds asparagus
1/3 cup fresh plain bread crumbs
½ cup olive oil
4 cloves garlic, minced
2 Tablespoons dried parsley
¼ cup fresh lemon juice
1 teaspoon salt
Fresh cracked pepper to taste
1 pound spaghetti pasta 1 cup pasta water

Bring a large pot of salted water to a boil. Add pasta and cook according to package directions. Set aside 1 cup of pasta water near the end of cooking before straining.

Meanwhile snap the ends off the asparagus and discard. Cut asparagus into three pieces each on the bias. Steam until tender crisp, about 2 minutes or so. Set aside in a large serving bowl.

In a skillet on medium heat toast the bread crumbs until golden brown. Stir often being careful not to burn. Add to the asparagus. Next heat the oil in the skillet and add the garlic. Fry until light golden brown for about a minute and add to serving bowl.

Add salt, pepper, lemon juice, and parsley to the bowl and stir. Next add the pasta and pasta water and toss to coat. Serve immediately.
-Thank you The Cooking Photographer via tastespotting :)

And now for Dessert! I'm super excited to make these brownies!
They are brownie cheesecakes sprinkled with powdered sugar and then drizzled with melted chocolate..mmm...
Ok so you would need to split it into two parts the brownie part calls for:
1 1/4 cup hazelnuts, chopped and lightly toasted
4 oz. bittersweet chocolate
3 oz. milk chocolate
1/2 cup unsalted butter
1/4 cup nutella
1/2 cup flour
1/2 tsp. baking powder
pinch of salt
1/2 cup sugar
2 large eggs

For the cheescake bit:
2 8 oz packages of cream cheese, room temp.
2/3 cup sugar
2 large egg yolks
1/2 tsp vanilla extract

Ok preheat the oven to 350 F. Line a cupcake pan with liners or use a mini cheescake pan, set aside. Heat the butter and chocolates over medium high heat in a saucepan, whisking constantly util completely melted. Remove from heat. In a large bowl, combine Nutella, sugar, eggs, salt and baking powder until well combined. Slowly add the hot chocolate mixture in small batches until well incorporated. Next whisk in the baking powder, flour and chopped hazelnuts until well combined. Fill the cupcake liners 1/3 full with the brownie mixture and set aside. In a medium bowl, combine all of the ingredients needed for the cheescake and whisk until smooth. Layer on top of the brownie batteruntil the cups are 2/3 full. Tap against the counter to make sure it is well settled in the pan. Bake until edges are slightly puffed and the center is set, about 15-20 minutes. Let cool completely.

mmm I cannot wait to get started on these! Ok thats all of my crazy for now :). I'm going to surf on over to nbc.com and watch Chuck now so, adios my friends!

Monday, December 8, 2008

I think there's something wrong with me

So finals are coming up and I am oddly not stressed. Whatever I got this, i'm taking International relations and Chinese- so yeah finals aren't that bad. But what is sort of driving me crazy is that for the past 4 days i've been fantasizing about baking these delicious butter cakes (butter cupcakes), with a buttercream frosting and I swear everytime I make up my mind to do it, something comes up. So you might ask, what's the problem you'll get to it when you get to it? Well it's bigger than just baking these cupcakes, I don't know if any of you noticed but i've gone on hiatus from politics- and for me that was my drug I mean I literally got off on reading up on the politics of the day and then reading up on the commentary of the politics of the day! I know, sad. But I think I burnt myself out with this past campaign- seriously for 22 months I knew exactly what was going on, who it was going on with, and if it would work. Now, i'm just like GET AWAY FROM ME!

So you can see my problem now is I have no idea what to do with myself. I mean I have hobbies and stuff but it's like I need my politics fix, but the idea that I need to read the news makes me think that I should wean myself off of it. So I guess i'm just going through some sort of withdrawal at the moment- which involves lots and lots of baking! Sorry if this made nooooo sense what so ever but I did have an eventual point for this post, Walnut Raisin Rice! (lol).


I love rice, and I love to snack- so I thought why not find a rice/snack recipe?? So I did, and it is yummmy and oh so simple.

Cooked long grain rice - 2 cups, I used Basmati
Walnuts - a big handful
Raisins - 2 tbsp
Olive oil - 1 tbsp
Lemon juice - 1 tsp
Salt - about 1 tsp
Pepper

Put the walnuts in a zip lock bag and crush them lightly using a rolling pin. Place the crushed walnuts in a pan and toast on medium heat till they are slightly browned. Be careful not to burn the nuts. When the nuts are done, add all remaining ingredients to the pan and mix well. You could use any combination of nuts and dried fruit, like pine nuts and cranberries for example and it would still turn out scrumptious :-D

Wednesday, December 3, 2008

I love soup.

Especially potato soup, probably because I love potatoes so much. Anyways so it's cold, and i've been craving potato soup and clam chowder but i'm too lazy to try making clam chowder so i'm going to make warm, creamy potato soup! It's actually really easy to make so I thought I would share :).


Ingredients
1 medium onion, diced
4 cloves garlic
2 lbs. potatoes, diced
4 cups broth (chicken, turkey or vegetable)
1 cup milk or cream
Salt and pepper, to taste
Cheddar cheese for topping if desired

In a large stock pot over medium heat, saute onions and garlic in 2 tbsp. oil until soft. Add diced potatoes and broth and bring to a boil. Turn heat to low and simmer, partially covered, for 20 minutes or until potatoes are soft. Remove from heat and add milk or cream. Pour the soup into a blender to blend until you reach a consistency you want, I like it lumpy. Salt and pepper to taste and voila! You have very simple potato soup!

Wednesday, November 19, 2008

chocolat!

I realize i've been MIA for a while, but my friends birthday's coming up in a few days and I wanted to make her a cake so I thought I would post it up here. It's called Chocolate Idiot Cake, and is suuuuuuper easy!


10 ounces bittersweet or semisweet chocolate (the best you can find is well..best!), coarsely chopped
7 ounces butter salted or unsalted cut into pieces
5 large eggs at room temp.
1 cup sugar

Preheat oven to 350
1. Butter a 9-inch (23 cm) springform pan* and dust it with cocoa powder, tapping out any excess.
2. Melt the chocolate and butter in a double boiler (or microwave), stirring occasionally, until smooth. Remove from heat.
3. In a large bowl, whisk together the eggs and sugar, then whisk in the melted chocolate mixture until smooth.
4. Pour the batter into the prepared springform pan and cover the top of the pan snugly with a sheet of foil. Put the springform pan into a larger baking pan, such as a roasting pan, and add enough hot water to the baking pan to come about halfway up to the outside of the cake pan.

Bake for 1 hour and 15 minutes.

You'll know the cake is done when it feels just set, like quivering chocolate pudding. If you gently touch the center, your finger should come away clean.
5. Lift the cake pan from the water bath and remove the foil. Let cake cool completely on a cooling rack.
Serve thin wedges of this very rich cake at room temperature with ice cream, or whipped cream.

Enjoy!

Tuesday, October 21, 2008

Coconut Macaroons !!


Ok so I've been making these cookies for a long time. And this is the ONE recipe I can make confidently without being afraid of screwing it up. It's so easy (6 minutes to make, and 20 to bake!), and they're so yummmy (yumm). This one time I decided they would taste better with chocolate, and so I drizzled them with them chocolate. And I was so happy with the result, that I declared myself to be a cooking genius.

Then that week I watched an episode on Oprah and apparently, chocolate drizzled coconut macaroons were like the biggest thing. Whatever.

Anyways, this goes out to all my fellow coconut fans! (and if you don't like coconut...you're missing out yo.)

Coconut Macaroons

1 1/3 cups flaked coconut... get the sweetened kind if you can
1/3 cup sugar
2 egg whites ...just save the yolks for an omelet for breakfast, or as a face or hair mask
(I know that's ew, but so many people say it all the time)
2 tablespoons all-purpose flour
1/2 teaspoon vanilla extract (or imitation vanilla)
1/8 teaspoon salt

Dump all the ingredients together in a bowl, and mix well. Use a teaspoon, and drop into a GREASED cookie sheet.
Bake at 350 degrees for 20 minutes, or until they are pale golden.
They should look like this.
Let them cool. Melt chocolate, and either cover or drizzle your coconut macaroons!!

So goooood. Warm and fluffy and sweet and so yummy.Ok that's it. I'm making them..

P.S. So I did end up making them the other day, and here's another tip to make them taste a little more chocolatey. Add cocoa powder!!! Personally I like them without it. And also don't use stale flaked coconut... :( But they still tasted fine (ahh the power of the coconut macaroons)

P.S.S.The picture isn't mine. http://nicole.grigor.ws/2008/05/16/orange-coconut-macaroons-in-chocolate